

This tool makes your AI image 10 times better
Adding an extra layer of details can be a game-changer

Hey friends,
A lot of the times when I work on client projects for producing AI work, I secretly say to myself that the work can improve so much in terms of details and there’s just not much technical capacity for it. However, this has not been the case anymore since last week!
I have been using a new tool called Krea in my workflow, which is a game-changer in adding an extra layer of detail to my images, resulting in work that is super high quality and rich.
In the below examples, I will show you how I have used this in my recent projects.
Interior Design

In this example, we started off with a simple clay model of the client’s kitchen. We had to produce a very quick visualisation of this space for a meeting that was going to take place on the same day!
Our client (the interior designer) had zero hope that they could have anything to show in the meeting and since they knew us, they reached out for an “emergency workshop” with us, where we sat down and reviewed the brief and very soon handed over a few iterations of a fully textured render, which could usually take them hours if not days to achieve!
Process:
Stable Diffusion (Clay model to Render) took 6 minutes

We used Stable Diffusion and ControlNet to apply the aesthetic vision for the kitchen space.
Krea Enhancer (To add details) took 3 minutes
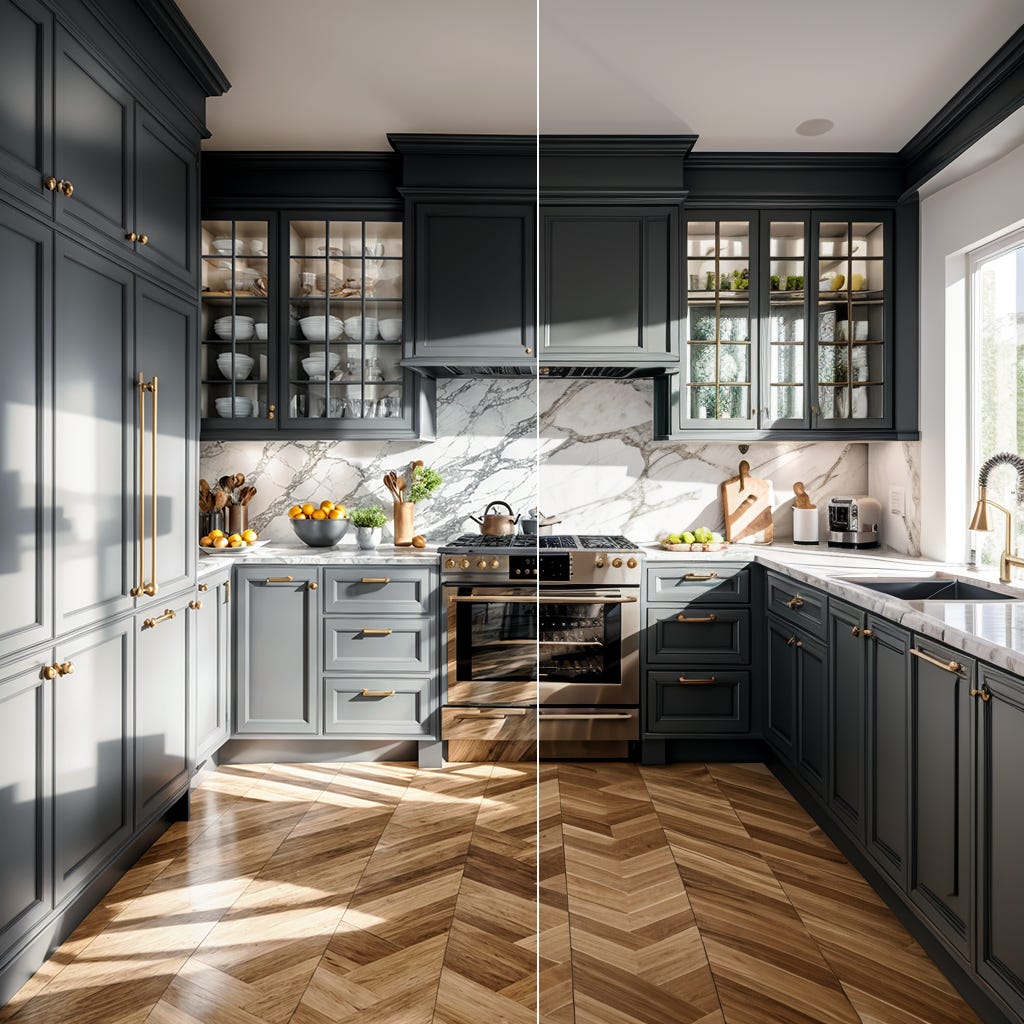
Krea then was introduced to the process of making the image look rich and detailed.
Fashion Design

The example above is an exercise I used in my workshop recently to demonstrate how we can take a fashion idea from a sketch and put it on a catwalk stage using a realistic-looking model and outfits.
Stable Diffusion (Sketch to Realistic)

Similar to the previous process, here we also use Stable Diffusion and ControlNet via canny pre-processor and a control weight of 1 to first turn the sketch image into a realistic-looking version. (Right to left)
Stable Diffusion Inpainting
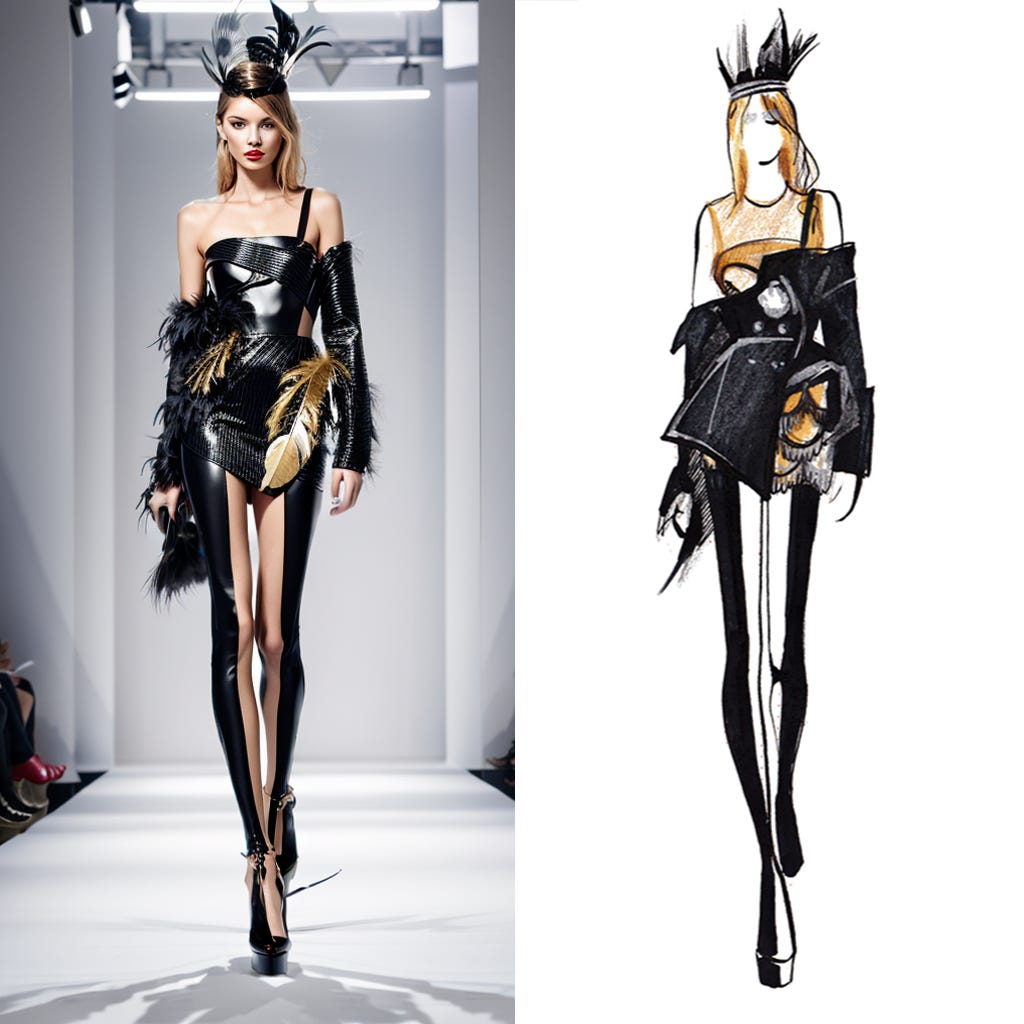
In the second step of the process, I used Stable Diffusion inpainting to imagine the model at a catwalk event. For this reason, I used inpaint upload since I could use a more precise mask of the inpainting area (the model) using Adobe Photoshop (as shown below). In this method, we have to upload the main image, followed by the mask png.

Krea Enhancer (to add more details)

In the final stage, the Krea enhancer tool was used to make the model and the clothing look more realistic and detailed (left image).
In conclusion, Krea is doing a fantastic job of adding an extra layer of richness to the images and its impact on the final presentation of the projects makes a lot of difference.
I hope you enjoyed reading this week’s newsletter and I can’t wait to write to you next week! In the meantime, if you have any questions, drop a line to hello@amirhosseinnooir.com and I’ll get back to you as soon as I can 🙂
Amir xx
❤️My Favourite Things
🎨Tool - Rundiffusion - If you find Stable Diffusion’s installation process complicated and unintuitive, feel free to use www.rundiffusion.com where you can use all Stable Diffusion’s interfaces instantly via a pay-as-you-go service, starting as cheap as $0.50 per hour.